A comprehensive guide to checking and maintaining fiberglass tanks
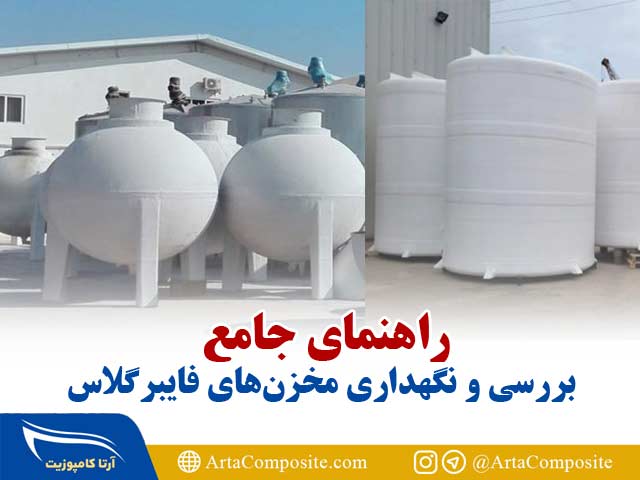
Comprehensive guide to checking and maintaining fiberglass tanks
Due to their corrosion resistance, density and flexibility, fiberglass tanks are used in various industries to store liquids, chemicals and other materials. However, like any other piece of equipment, fiberglass tanks require regular inspection and maintenance to ensure their efficient operation and useful life. In this comprehensive guide, we teach you how to check and maintain fiberglass tanks and provide detailed steps and tips to maintain and maintain tanks in optimal condition.
Inspection and maintenance guide for fiberglass tanks
1- Safety precautions
Before you start inspecting and maintaining your fiberglass tank, make safety a priority. Fiberglass tanks may contain hazardous materials, and the inspection process itself poses risks. Make sure that:
- You have personal protective equipment (PPE) including gloves, safety glasses, a respirator, and appropriate clothing.
- If you work with dangerous chemicals, have adequate ventilation in the workshop.
- Inspect tanks in a safe work environment free of flames or potential sources of ignition.
- Complete adequate training before starting the inspection process.
Inspection and maintenance guide for fiberglass tanks
2- Collecting the necessary tools and materials
The following tools and materials are required to perform a detailed inspection and perform the necessary maintenance tasks:
Tools:
- flashlight
- Ultrasonic thickness measuring device
- Non Destructive Testing (NDT) Equipment
- Inspection mirrors and cameras for difficult areas
- Cleaning tools (cleaning materials, brushes, cloths, cleaning solutions)
- Leak test equipment (pressure gauge, soapy solution)
- Safety Equipment (PPE)
Materials:
- Restoration and repair materials (fiberglass resin, reinforcement, fiberglass fibers)
- Coating and layering materials (suitable for stored material)
- Structural reinforcement materials (if necessary)
- Oils and anticorrosives
- Adhesives and seals (if needed)
Inspection and maintenance guide for fiberglass tanks
3- External inspection
visual inspection:
Clean the surface of the tank: First, clean the outer surface of the tank to remove dirt and excess particles and prepare for a closer inspection.
Carefully check the outer surface for cracks, bubbles, delamination or any other damage. Pay more attention to the areas around joints, nozzles and seams.
Check the tanks for discoloration: Take any discoloration or fading of the fiberglass seriously, as these conditions may be due to damage from ultraviolet (UV) radiation, which occurs most often when the tank is exposed to direct sunlight. be the sun
Inspect supports and mounts: Inspect tank supports and mounts for wear, settling, or corrosion.
Ultrasonic thickness test:
Select test points: Select a few random points on the outer surface of the tank for ultrasonic thickness testing.
Set up the device: Set up the ultrasonic thickness gauge according to the manufacturer's instructions.
Measure the thickness: Place the device on the selected points and measure the thickness of the fiberglass. Record the measurements.
Compare with original thickness: Compare the measured thickness with the original specification of the tank. Significant deviations may indicate corrosion or degradation.
Assessment of surface condition:
Check Covers and Liners: If your tank has protective covers or liners, check them for signs of wear, peeling, or degradation.
Look for corrosion or rust: Check for any signs of corrosion or rust on metal components such as fittings and supports.
Check Seals and Gaskets: Check seals and gaskets around openings for signs of wear, cracks, or leaks.
Inspection and maintenance guide for fiberglass tanks
4- Internal inspection
Cleaning:
Safe tank entry: If you need to enter a tank, learn and follow confined space instructions and provide adequate ventilation before entering the tank.
Remove deposits: Using suitable cleaning solutions and brushes, clean the interior of the tank to remove any residue or deposits.
Rinse carefully: Wash the inside of the tank carefully with water and detergent after cleaning.
visual inspection:
Inspect the interior surface: Carefully inspect the entire interior surface of the tank for cracks, bubbles, flaking, or other defects. Use inspection mirrors or cameras for hard-to-reach areas.
Check for biological growth: Look for any signs of biological growth or microbiologically influenced corrosion (MIC).
Check fittings and nozzles: Check fittings, nozzles and internal seams for signs of leaks or corrosion.
Leakage test:
Sealing openings: Seal all tank openings securely.
Pressure test: Pressurize the tank a little and monitor the pressure for a while, any drop in tank pressure may indicate a leak.
Soap solution test: Apply soap solution to joints and seams and look for bubbling, which indicates a leak.
Vacuum test: As an alternative to the pressure test, you can perform a vacuum test by creating a vacuum inside the tank and checking for any increase in pressure that will indicate air infiltration and is a sign of a leak.
Inspection and maintenance guide for fiberglass tanks
5- Maintenance and repairs
cleaning:
Removal of residual deposits: If the internal inspection shows that deposits remain, repeat the cleaning operation until the inside of the tank is clean.
Disinfection:
For tanks that store water or other sensitive materials, disinfect after cleaning to prevent biological growth.
Repair and cover:
Prepare the surface: Sand or grind the damaged area to remove loose fibers and create a smooth surface.
Apply resin: Mix fiberglass resin and hardener according to the manufacturer's instructions and apply it to the damaged area. Apply as seen.
Place fiberglass cloth: Place a layer of fiberglass cloth over the resin saturated area.
Add additional layers: If necessary, add additional layers of resin and fabric until the restoration is flush with the surrounding surface.
Drying and inspection: Leave the coating or layering to dry for a few hours, and then after drying, check for defects and irregularities and correct them if necessary.
Structural reinforcement:
Assessment: If the tank structure shows signs of erosion or weakness, consult a structural engineer to assess the extent of the damage.
Reinforcement: Pay attention to the structural engineer's recommendations for strengthening the tank structure, which may include adding supports or structural reinforcements.
Inspection and maintenance guide for fiberglass tanks
6- Storage of documents
Keeping accurate records of fiberglass tank inspection and maintenance activities is critical to tracking tank condition over time and ensuring regulatory compliance. Enter the following information:
- Date of review and maintenance
- Survey findings and measurements
- Maintenance and repair measures
- Materials and coatings used
- Any advice from engineers or experts
- Compliance with safety and environmental regulations
Inspection and maintenance guide for fiberglass tanks
7- Conclusion
Checking and maintaining a Fiberglass tank is critical to ensure longevity, safety and efficiency in storing a variety of materials. Regular inspections help detect potential problems earlier, allow for timely repairs, and prevent costly shutdowns or environmental incidents.
